Copyright © Fred Weinhaus My scripts are available free of charge for non-commercial (non-profit) use, ONLY. For use of my scripts in commercial (for-profit) environments or non-free applications, please contact me (Fred Weinhaus) for licensing arrangements. My email address is fmw at alink dot net. If you: 1) redistribute, 2) incorporate any of these scripts into other free applications or 3) reprogram them in another scripting language, then you must contact me for permission, especially if the result might be used in a commercial or for-profit environment. Usage, whether stated or not in the script, is restricted to the above licensing arrangements. It is also subject, in a subordinate manner, to the ImageMagick license, which can be found at: http://www.imagemagick.org/script/license.php Please read the Pointers For Use on my home page to properly install and customize my scripts. |
|
Generates a strip panoramic image from a linear type fisheye image with optional vertical perspective correction. |
last modified: January 17, 2022
|
USAGE: fisheye2pano [-w width] [-e extend] [-h hcen,hran] [-f format] [-p pfov] [-c xc,yc] [-v vcen,vrad] [-r radius] [-vp vpmethod] [-b bgcolor] infile outfile
-w .... width ........... width of output; default is same as input PURPOSE: To generate a strip panoramic image from a linear type fisheye image with optional vertical perspective correction. DESCRIPTION: FISHEYE2PANO generates a strip panoramic image from a linear type fisheye image. The output formats are either angle, tilt perspective or level perspective. These describe the vertical format for the image, where the latter two are perspectively corrected. The tilt perspective will be a tilted view with the mid radius at the center of the perspective. The level perspective will be looking horizontally. The horizontal format will always be angle. ARGUMENTS: -w width ... WIDTH is the desired width for the output image. If not specified, then the width of the output will be identical to that of the input or to 2*radius of circular area of the input if provided. If the width is adjusted then the height will be adjusted in proportion. -e extend ... EXTEND is the percentage to increase the height of the output from its natural size. A value of 100 results in the natural height. The natural height is (ifov/360)*width, where ifov is the input fisheye image vertical field of view and is given by 2*abs(vcen-vrad). This is only allowed for the two perspective output formats. It will not change the scale of the image in the vertical dimension. It only allows more data to be viewed. -h hcen,aran ... HCEN,HRAN are the angular direction for the horizontal center of the output image and the horizontal angular range between left and right side of the output; default=0,360; where hcen increases clockwise from the top center of the input as seen from its center and must be between 0 and 360. -f format ... FORMAT is the output image vertical format. The choices are: angle (A), tilt (T) perspective and level (L) perspective. (Note: the output image horizontal format is always angle.) The default is angle. If tilt (T) is chosen, then the output image will have perspective correction applied in the vertical direction and the image will be centered about the mid-angle of the fisheye image. In other words a tilted vertical perspective will be produced. If level (L) is chosen, then the output image will also have perspective correction applied in the vertical direction. But the view will be one that is not tilted, but looking horizontally. The horizon line will be at or near the top of the outpt image for a fisheye image whose center is the nadir and will be at or near the bottom of the output image for a fisheye image whose center is the zenith. The exact placement depends upon the ratio of vrad to vrange=abs(vcen-vrad). The level format is generally only useful for the latter case and especially with hyperwide fisheye images whose field of view across the circular area diameter is greater than 180 degrees. -p pfov ... PFOV is the vertical output perspective image field of view in degrees. Values are floats in the range 0<pfov<180. The default is to use the vertical viewing range of the fisheye image, which is vrange = (vrad-vcen) = ifov/2 (half of the field of view across the circular diameter). The amount of input image in the output perspective image will depend upon the pfov parameter. Note that in comparison, a value of 27 degrees corresponds to a vertical field of view from a 35 mm camera (film size 36mm x 24mm) with a 50mm focal length lens, i.e. a "normal" view. -c xc,yc ... XC,YC are the pixel coordinates in the input fisheye image that correspond to the (circular fisheye area) center. The pixel at this coordinate will then become the center of the perspective image. The default values are the center of the input fisheye image. Values are non-negative floats. You can use the -d option to validate your choice of center and radius for the fisheye image. See more below. -v vcen,vrad ... VCEN,VRAD are the vertical viewing angles in the input fisheye image corresponding to the center of the circular area and to its radius (perimeter). The default is -90,0 which corresponds to a 90 degree vertical range of view, i.e. nadir to horizontal and thus 2*90=180 full fisheye diameter field of view). Note: vcen will generally be either -90 or +90, even if the specs says the min value is greater than -90 or the max value is less than +90. You can tell this by the dark circlular area at the center which extends from the center out to whatever is the relevant min or max value specified by the camera system. -r radius ... RADIUS is the radius of the fisheye circular area in the input image. Values are floats greater than zero. The default is half the minimum value between the input image width and height. -d ... Use of this argument produces an ouput image that is simply the input image with a circle drawn on it to show where the expected fisheye image area is located. You can specify a radius and center point if you want to adjust the transformation to use the precise center and radius that matches the area delimited by the circle. Radius and center default as described above. -s scolor ... SCOLOR is the stroke color to use to draw the circle when the -d argument is used. The default is white. -vp vpmethod ... VPMETHOD is the virtual-pixel method. Any valid IM virtual-pixel setting is allowed. The default is black. -b bgcolor ... BGCOLOR is the background color to use with vpmethod=background. Any valid IM color may be used. The default is black.
See the following references for definitions and mathematical details of each
type of fisheye lens: NOTE: This script uses -fx and therefore will be rather slow. CAVEAT: No guarantee that this script will work on all platforms, nor that trapping of inconsistent parameters is complete and foolproof. Use At Your Own Risk. |
|
Linear Circular Fisheye Image |
||
|
Original |
|
|
|
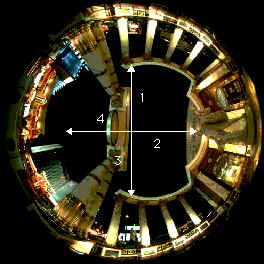
Diagram Of Look |
|
|
|
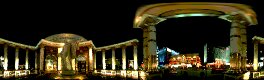
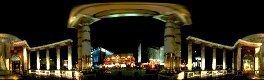
Example 1: |
Diagram Rotate So That Center Direction Is At Top For Easier Comparison 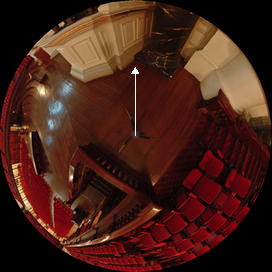
|
|
|
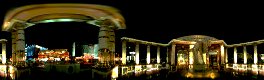
Example 2: |
Diagram Rotate So That Center Direction Is At Top For Easier Comparison 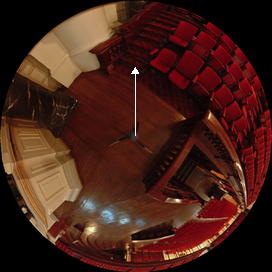
|
|
|
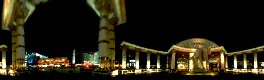
Example 3: |
Diagram Rotate So That Center Direction Is At Top For Easier Comparison 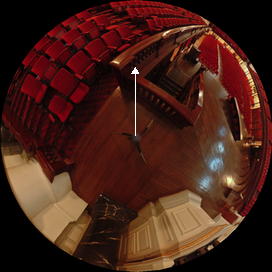
|
|
|
Example 4: |
Diagram Rotate So That Center Direction Is At Top For Easier Comparison 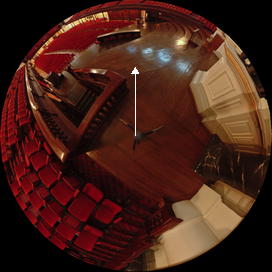
|
|
|
Example 5: |
Diagram Rotate So That Center Direction Is At Top For Easier Comparison
|

|
|
Example 6: |
|
|
|
Example 7: |
|
|
|
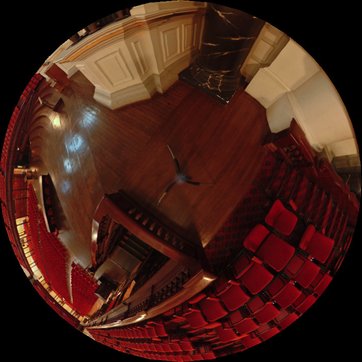
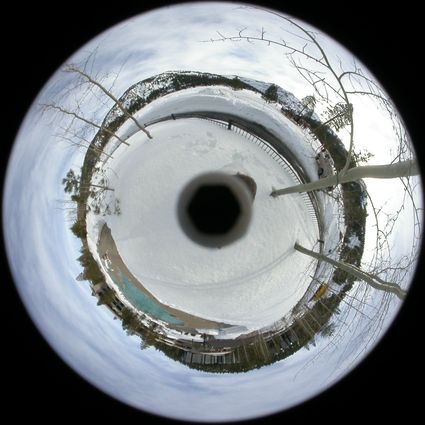
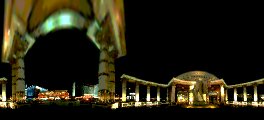
Hyperwide (Panoramic) Fisheye Image |
||
|
Original |
|
|
|
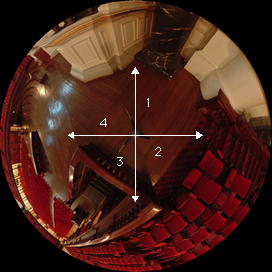
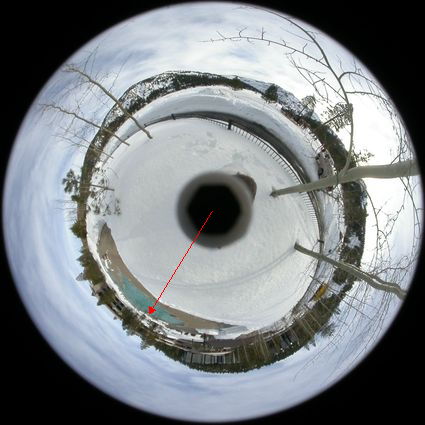
Diagram Of Look |
|
|
|
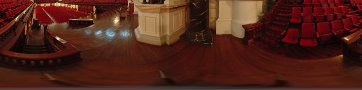
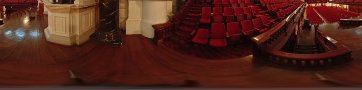
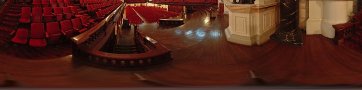
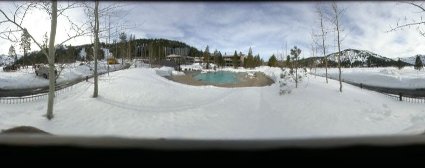
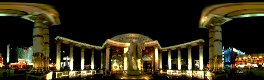
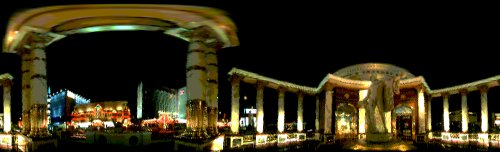
Example 1: |
Diagram Rotate So That Center Direction Is At Top For Easier Comparison 
|
|
|
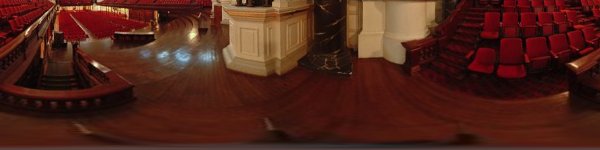
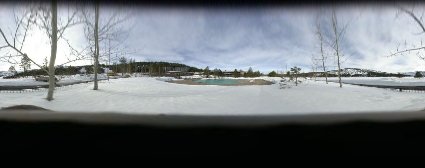
Example 2: |
Diagram Rotate So That Center Direction Is At Top For Easier Comparison
|
|
|
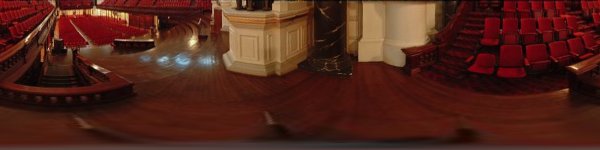
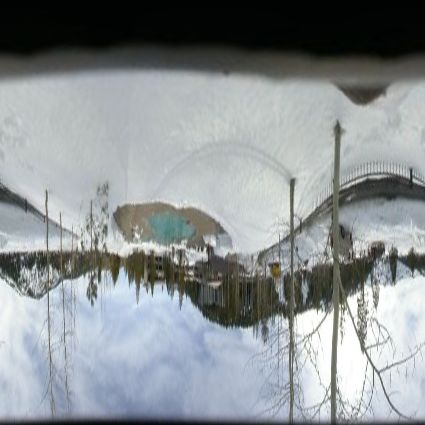
Hyperwide (Panoramic) Fisheye Image |
||
|
Original |
|
|
|
Diagram Of Look |
|
|
|
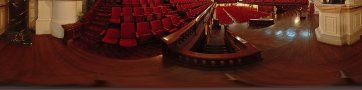
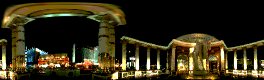
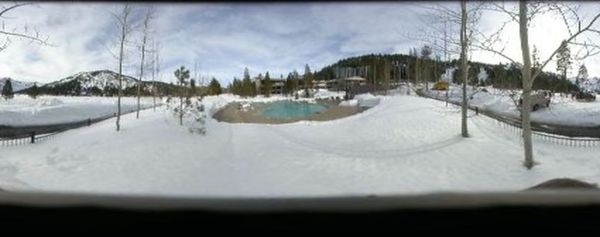
Example 1: |
Diagram Rotate So That Center Direction Is At Bottom For Easier Comparison 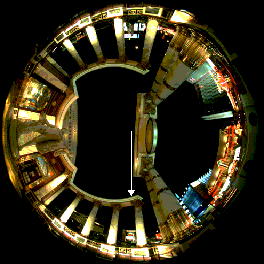
|
|
|
Example 2: |
Diagram Rotate So That Center Direction Is At Bottom For Easier Comparison 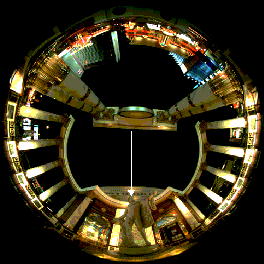
|
|
|
Example 3: |
Diagram Rotate So That Center Direction Is At Bottom For Easier Comparison 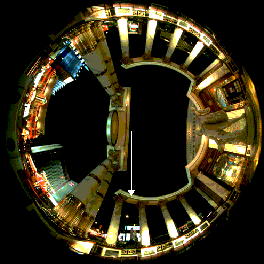
|
|
|
Example 4: |
Diagram Rotate So That Center Direction Is At Bottom For Easier Comparison 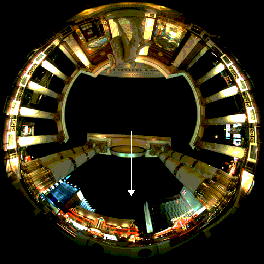
|
|
|
Example 5: |
Diagram Rotate So That Center Direction Is At Bottom For Easier Comparison
|
|
|
Example 6: |
Diagram Rotate So That Center Direction Is At Bottom For Easier Comparison
|
|
|
Example 7: |
Diagram Rotate So That Center Direction Is At Bottom For Easier Comparison
|
|
|
Example 8: |
Diagram Rotate So That Center Direction Is At Bottom For Easier Comparison
|
|
|
Example 9: |
Diagram Rotate So That Center Direction Is At Bottom For Easier Comparison
|

|
|
Similar Results Using Multiple IM "Convert" Steps |
||
|
Original |
||
|
|
||
|
Diagram Of Look |
||
|
|
||
|
Step 1: | ||
|
||
|
Step 2: |
||

|
||
|
Step 3: |
||
|
||
|
Step 4: |
||
|
||
|
What the script does is as follows:
This is equivalent to the following IM commands for the case of a
|