Copyright © Fred Weinhaus My scripts are available free of charge for non-commercial (non-profit) use, ONLY. For use of my scripts in commercial (for-profit) environments or non-free applications, please contact me (Fred Weinhaus) for licensing arrangements. My email address is fmw at alink dot net. If you: 1) redistribute, 2) incorporate any of these scripts into other free applications or 3) reprogram them in another scripting language, then you must contact me for permission, especially if the result might be used in a commercial or for-profit environment. Usage, whether stated or not in the script, is restricted to the above licensing arrangements. It is also subject, in a subordinate manner, to the ImageMagick license, which can be found at: http://www.imagemagick.org/script/license.php Please read the Pointers For Use on my home page to properly install and customize my scripts. |
|
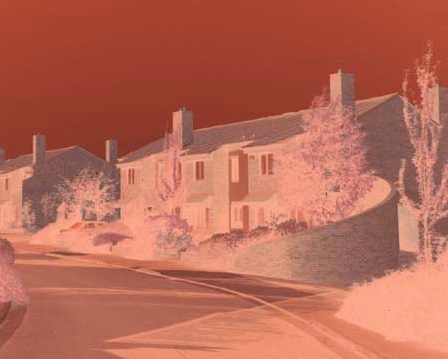
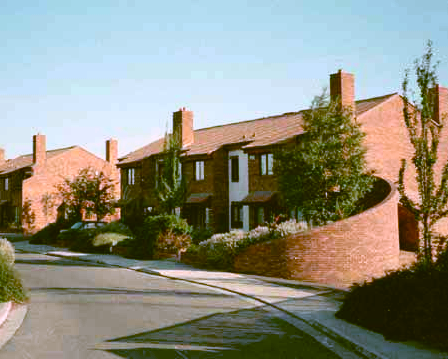
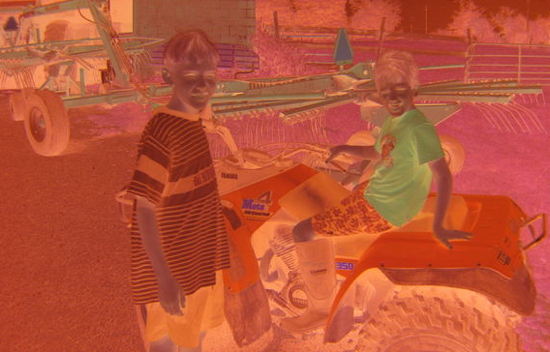
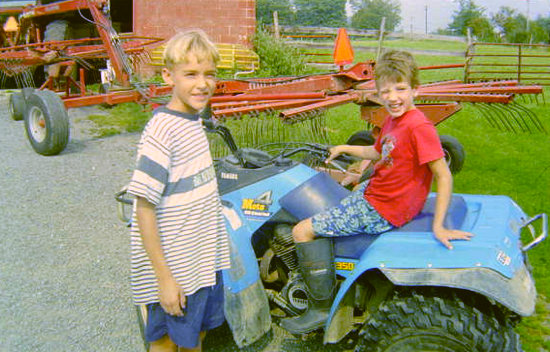
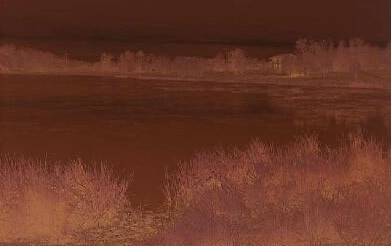
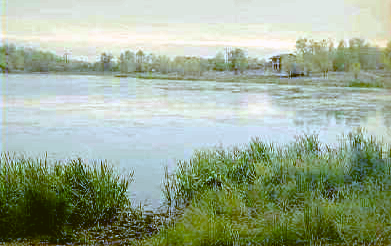
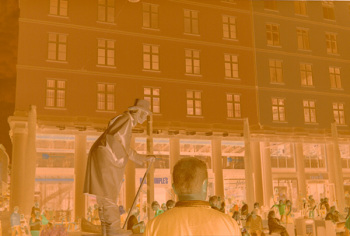
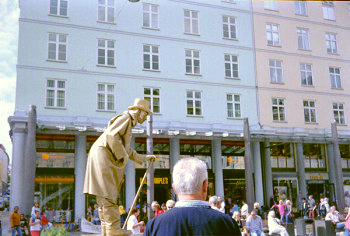
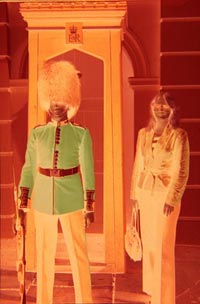
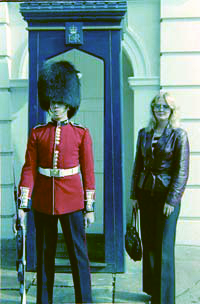
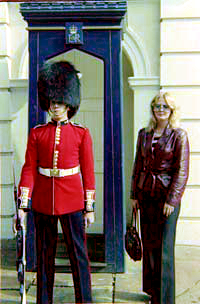
Converts from a (scanned film) negative image to a positive image. |
last modified: April 20, 2026
|
USAGE: negative2positive [-a autostretch] [-l cliplow] [-h cliphigh]
[ -c color] [-d density] [-cb colorbalance] [-P1 percent1] [-P2 percent2]
-a .... autostretch .... autostretch image channels; options are: PURPOSE: To convert from a (scanned film) negative image to a positive image. DESCRIPTION: NEGATIVE2POSITIVE converts from a (scanned film) negative image to a positive image. Options include: autostretching the image channels with or without clipping, color filtering and to color balance via white balance, gray balance, both, automatic or via levels. ARGUMENTS: -a autostretch --- autostretch image channels as preprocessing step. The options are: together (t), separate (s) or none (n). The default=separate. Note, for some images with severe channel autostretch, the option separate can cause severe color shifts. -l cliplow ... CLIPLOW is the cumulative percent at the low end of the histogram whose graylevel will be autostretched to full black. Values are floats between 0 and 100. If cliplow=0, then the autostretch will locate the minimum value in the channel histogram. The default=1. -h cliphigh ... CLIPHIGH is the cumulative percent at the high end of the histogram whose graylevel will be autostretched to full white. Values are floats between 0 and 100. If cliplow=0, then the autostretch will locate the maximum value in the channel histogram. The default=1. -c color ... COLOR is the desired filter color. Any valid IM opaque color value is valid. The default=yellow, since yellow is the complement of blue. (After the image is negated, the color is mostly bluish and yellow will remove most of the blue tint). -d density ... DENSITY of the color filter. Values are 0<=integers<=100. 0 is no color filter processing. 100 is most change towards the selected color. The default=15 for colorbalance != level and the default=0 for colorbalance = level. Density, generally, will not make any significant change when colorbalance = level. -cb colorbalance ... COLORBALANCE mode. The choices are none, gray, white, both, auto or level. The default=auto. Both will be an equal blend of gray and white. Auto will try to choose the better of gray or white depending upon which one's percent selected pixels' rmse value (from gray or white, respectively is the smallest value. Level uses an autolevel process to get the black point, white point and (gray point converted to) gamma values. -P1 percent2 ... PERCENT2 threshold for level processing. Values are 0<floats<100; default=1. -P2 percent2 ... PERCENT2 is the percent threshold for detecting gray/white in the image for auto color balance. Values are 0<floats<100. The default=1. NOTE: I thank Dr. Guenter Grau for the suggestion to normalize the r,g,b ratios by their average in the color balance part of the code.
REFERENCES AND TUTORIALS: CAVEAT: No guarantee that this script will work on all platforms, nor that trapping of inconsistent parameters is complete and foolproof. Use At Your Own Risk. |
|
Example 1 |
|
Original |
|
|
Arguments: |
|
|
Example 2 |
|
Original |
|
|
Arguments: |
|
|
Example 3 |
|
Original |
|
|
Arguments: |
|
|
Example 4 |
|
Original |
|
|
Arguments: |
|
|
Example 5 |
|
|
Original |
|
|
|
|
Arguments: |
Arguments: |
|
|
|
What the script does is as follows:
This is equivalent to the following IM commands for the case of rgb in the range 0 to 255:
|