Copyright © Fred Weinhaus My scripts are available free of charge for non-commercial (non-profit) use, ONLY. For use of my scripts in commercial (for-profit) environments or non-free applications, please contact me (Fred Weinhaus) for licensing arrangements. My email address is fmw at alink dot net. If you: 1) redistribute, 2) incorporate any of these scripts into other free applications or 3) reprogram them in another scripting language, then you must contact me for permission, especially if the result might be used in a commercial or for-profit environment. Usage, whether stated or not in the script, is restricted to the above licensing arrangements. It is also subject, in a subordinate manner, to the ImageMagick license, which can be found at: http://www.imagemagick.org/script/license.php Please read the Pointers For Use on my home page to properly install and customize my scripts. |
|
Applies either a rectangular (cartesian) to polar transformation or a polar to rectangular (cartesian) transformation on an image. |
last modified: December 09, 2023
|
USAGE: polar [-m mode] [-c xc,yc] [-r rmn,rmx] [-a amn,amx] [-v vpmode] [-b bgcolor] infile outfile
-m .... mode ......... rect2polar or polar2rect; default=rect2polar PURPOSE: To apply either a rectangular (Cartesian) to polar transformation or a polar to rectangular (Cartesian) transformation on an image. DESCRIPTION: POLAR applies either a rectangular (Cartesian) to polar transformation or a polar to rectangular (Cartesian) transformation on an image. The user has control of the range of radius, angle and center in the transformation. ARGUMENTS: -m mode ... MODE is the transformation mode, which can be either rect2polar (rectangular to polar) or polar2rect (polar to rectangular). The former, rect2polar, treats the input as a normal rectangular image with columns representing X and rows representing Y and treats the output as having columns representing angle and rows representing radius. The latter, polar2rect, treats the input as having columns representing angle and rows representing radius and treats the output as having columns representing X and rows representing Y. Note that in a polar image, nominally the left column is angle=amn=-180, the middle column is angle=0 and the right column is angle=amx=180. Similarly, the top row is radius=rmn=0 and the bottom row is radius=rmx=(half image diagonal). -c xc,yc ... XC,YC are the pixel coordinates for the transformation center. The default is the image center. -r rmn,rmx ... RMN,RMX are the min and max radii. By default, rmn=0 and rmx=(half image diagonal). This provides a transformation that includes the whole image. However, for the rect2polar mode, this will cause the output image to contain areas that are outside the input image. They will be filled as determined by the virtual pixel setting. Value are non-negative floats. Values are generally non-negative floats, but four other choices are allowed: w, h, d and m, where w=width/2, h=height/2, d=diagonal/2 and m=min(width,height)/2. -a amn,amx ... AMN,AMX are the min and max angles. By default, amn=-180 and amx=180. Values for amn and amx are floats between -180 and 180. -v vpmode ... VPMODE is the virtual-pixel mode. Any valid IM virtual-pixel setting is allowed. The default is edge. -b bgcolor ... BGCOLOR is the background color to use with vpmode=background. Any valid IM color may be used. The default is black. Note that this script may be slow due to the use of -fx. CAVEAT: No guarantee that this script will work on all platforms, nor that trapping of inconsistent parameters is complete and foolproof. Use At Your Own Risk. |
|
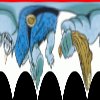
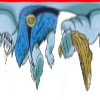
Rectangular To Polar Transformation -- Full 360 Degree Range, Max Radius = Diagonal/2, Vary Y Center Coordinate |
||||
|
Original Image |
Rect2Polar |
Rect2Polar |
Rect2Polar |
Rect2Polar |

|
|
|

|

|
|
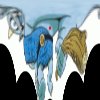
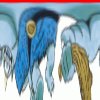
Rectangular To Polar Transformation -- 180 Degree Range, Max Radius = Diagonal/2, Vary Center Y Coordinate |
||||
|
Original Image |
Rect2Polar |
Rect2Polar |
Rect2Polar |
Rect2Polar |
|
|

|
|
|

|
|
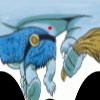
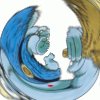
Rectangular To Polar Transformation Followed By Polar To Rectangular |
||
|
Original Image |
Rect2Polar |
Polar2Rect |
|
|
|

|
|
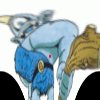
Original Image |
Rect2Polar |
Polar2Rect |
|
|
|

|
|
Original Image |
Rect2Polar |
Polar2Rect |
|
|
|

|
|
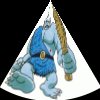
Polar To Rectangular Transformation -- Full 360 Degree Range |
|||
|
Original Image |
Polar2Rect |
Polar2Rect |
Polar2Rect |
|
|

|

|
|
|
Polar To Rectangular Transformation -- Vary Angular Range, Max Radius = 100, Center Y = 0 |
|||
|
Original Image |
Polar2Rect |
Polar2Rect |
Polar2Rect |
|
|

|

|
|
|
Polar To Rectangular Transformation -- Full 360 Degree Range, Center Y = 0, Variation In Radii |
|||
|
Original Image |
Polar2Rect |
Polar2Rect |
Polar2Rect |
|
|

|
|

|
|
Polar To Rectangular Followed By Rectangular To Polar Transformation |
||
|
Original Image |
Polar2Rect |
Rect2Polar |
|
|
|
|
|
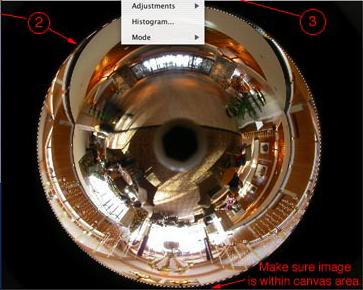
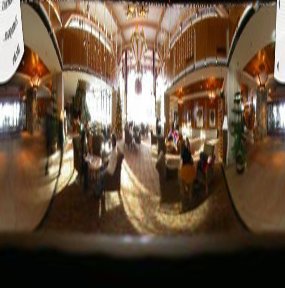
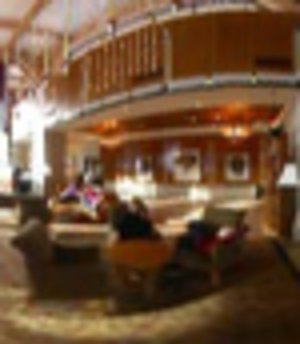
Real World Application -- Convert 360 Degree "Fisheye" View To Strip Panorama And Extract Subsection Example Follows Procedure Outlined At www.0-360.com
Note that this picture is not from a true fisheye lens. |
|
Original Image |
|
|
|
|
Trimmed To Size Of Circle |

|
|
|
|
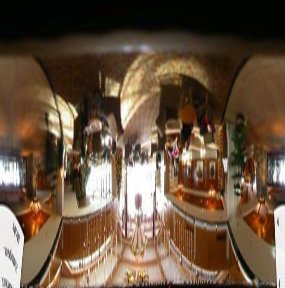
Polar Transform |
|
|
|
|
Flip Image |
|
|
|
|
Resize Image 100% x 39% |

|
|
|
|
Crop Image As Desired |

|
|
|
|
Enlarge |
|
|
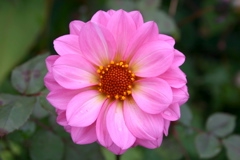
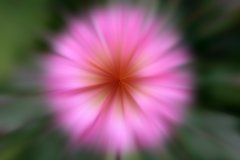
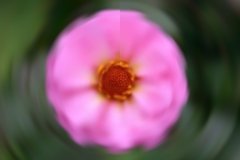
Radial Blur
infile="flower.jpg" |
|
|
Original Image |
|
|
Image In Polar Coordinates |

|
|
20 Pixel Vertically Blurred Polar Image |

|
|
Image Back In Cartesian (Rectangular) Coordinates |
|
|
Angular Blur
infile="flower.jpg" |
|
|
Original Image |
|
|
Image In Polar Coordinates |
|
|
10 Pixel Horizontally Blurred Polar Image |

|
|
Image Back In Cartesian (Rectangular) Coordinates |
|
|
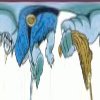
Image Rotation
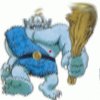
infile="cyclops1.jpg" |
|
|
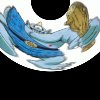
Original Image |
|
|
Image In Polar Coordinates |
|
|
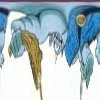
Roll Image To Rotate 180 deg |
|
|
Image Back In Cartesian (Rectangular) Coordinates |

|
|
What the script does is as follows:
This is equivalent to the following IM commands for the case
And this is equivalent to the following IM commands for the case
|